
Choose a booth on the floor plan
Read the floor plan, find a booth, check what it includes, and add it to your cart.
Most shows on Map D let you pick your own booth on an interactive floor plan. Your organizer shares the link to their registration page. It usually ends in /register.
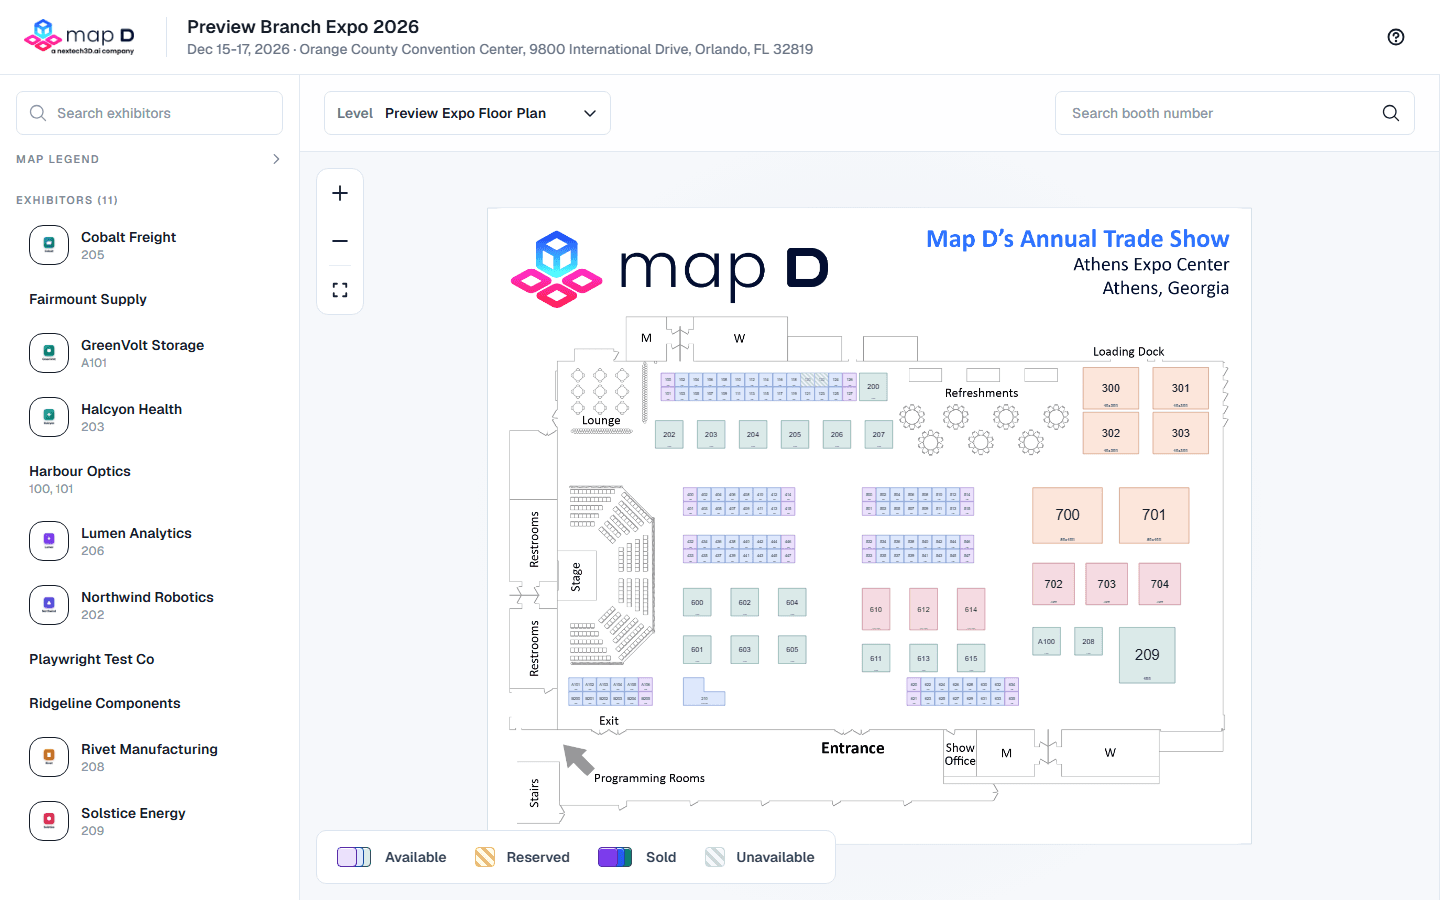
Read the floor plan
Every booth is coloured by its status. The legend in the bottom corner explains the colours:
| Status | What it means |
|---|---|
| Available | You can select it. |
| Reserved | Held by someone else who is checking out, or held back by the organizer. It may become available again. |
| Sold | Taken. Hover to see which company has it. |
| Unavailable | Not for sale online. |
Availability updates by itself every few seconds, so you always see the current picture.
Hover over a booth to see its number, size, type and price. The Map legend in the sidebar shows booth types. For each type, the left swatch is the open colour and the right swatch is the taken colour.
Find your way around
- Zoom: use the zoom buttons, or hold Ctrl (⌘ on a Mac) and scroll.
- Print: select Print map under the zoom buttons to print the whole floor plan on one page, whatever part of it you are zoomed into.
- Find a booth: type a number in Search booth number and press Enter.
- Find an exhibitor: on a computer, use Search exhibitors in the left sidebar.
- Documents: files and links your organizer shares, such as the rules for exhibitors, are listed in the left sidebar under Documents.
- Other floors or halls: if the show has several floor plans, choose one from the Level menu. Booths already in your cart stay in your cart.
Select a booth
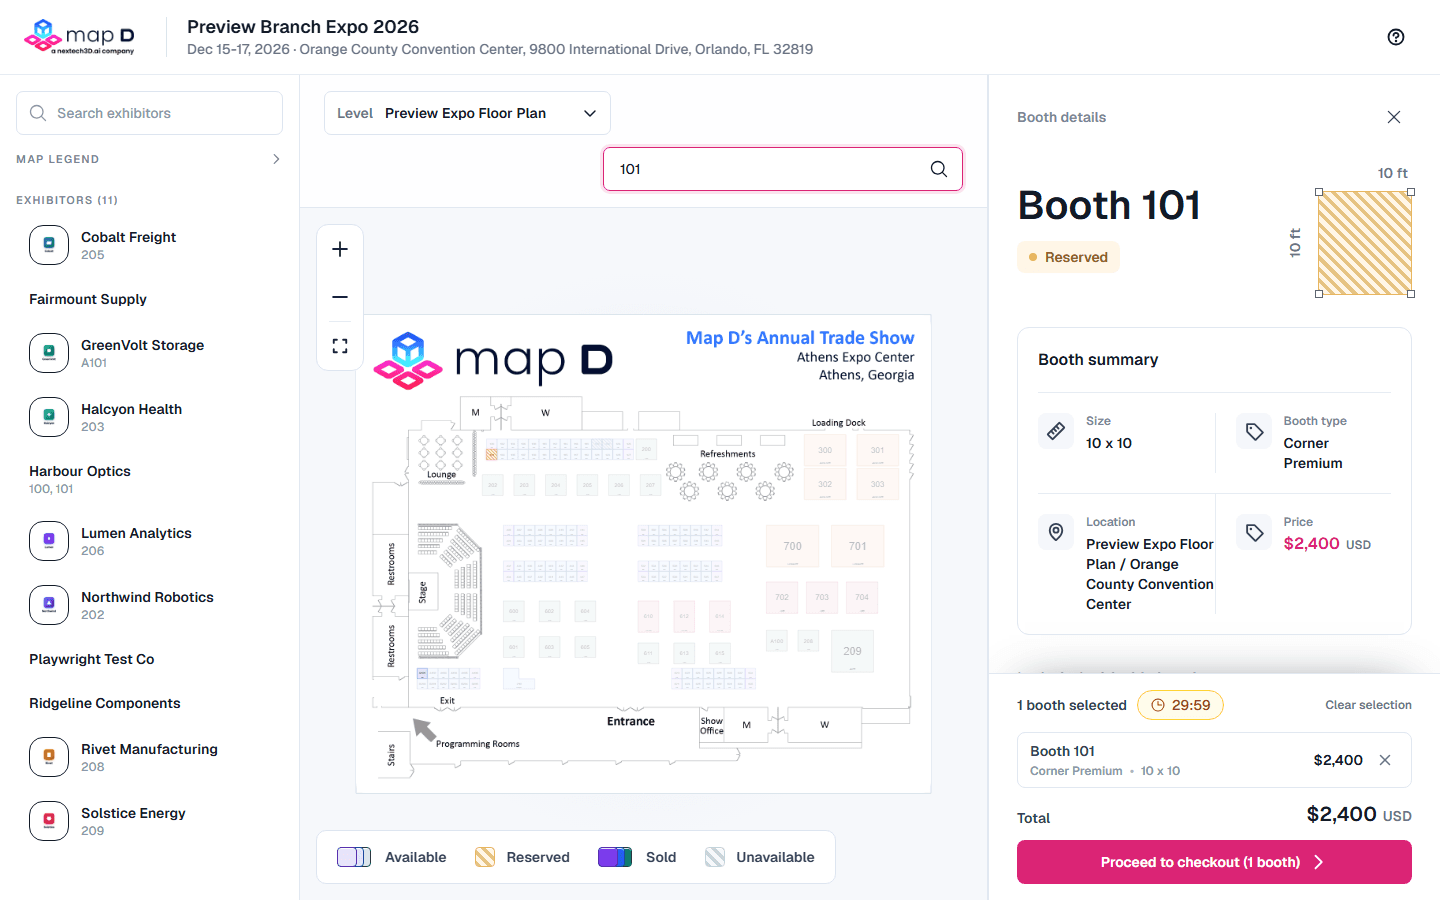
Select an available booth
Select the booth. Map D reserves it for you straight away and a countdown starts. See Booth holds and the checkout timer.
Check the details
The Booth details panel shows the booth's size, type, location, price, and what is included with it.
Add more booths, if you need them
Select more booths to add them. Select a booth in your cart again to remove it, or use Clear selection to start over. Your organizer may limit how many booths one order can include.
Go to checkout
Select Proceed to checkout. See Check out.
Booths that need a booth code
Your organizer may keep a booth for you, for example the one you had last year. Hovering over it shows Booth code required, and some shows show Price shown once you enter the booth code instead of the price.
When you select the booth, a window asks for the code. Type the code your organizer sent you and select Select booth. Codes aren't case-sensitive. The booth is then in your cart like any other, with its price.
Messages you might see
- "This booth could not be reserved" or "Booth … is no longer available": someone reserved it moments before you. Choose another booth.
- "Orders are limited to … booths": remove a booth before adding a different one.
- "Checkout unavailable" or "Online checkout for this show isn't open yet": your organizer has not opened online sales. Contact them to reserve a booth.
- "Too many reservation attempts": wait a few minutes, then try again.
- "That booth code isn't right for booth …": check the code in your organizer's email and type it again.
- "Too many booth code attempts": wait a few minutes, then try again, or ask your organizer for the code.
- "The booth code for booth … has changed": your organizer changed the code while the booth was in your cart. Remove the booth, select it again, and enter the new code.
Before you see prices, some shows ask you to choose a registration type or enter an access code. See Registration types and access codes.
Still need help?
For questions about your show, booth or invoice, contact your show organizer. Their contact details are in your invite and order emails. Who to ask
Last updated September 29, 2026